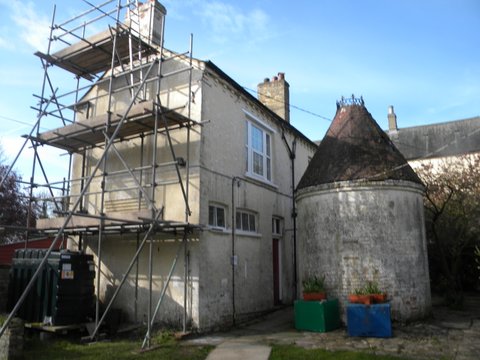
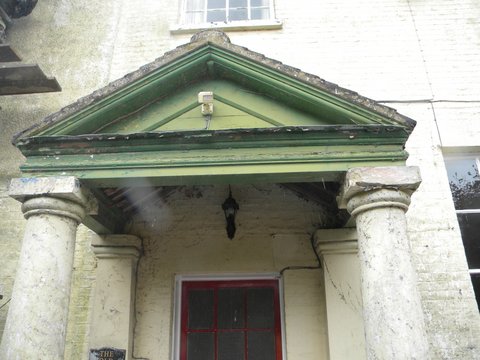
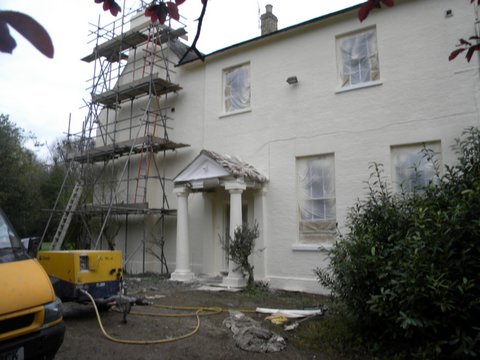
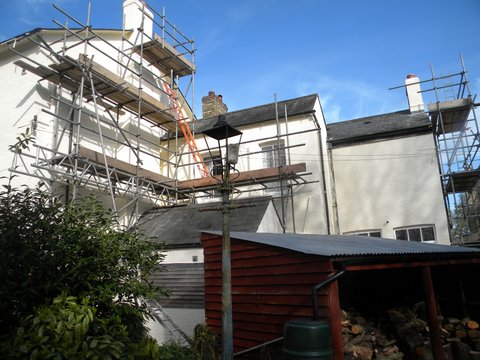
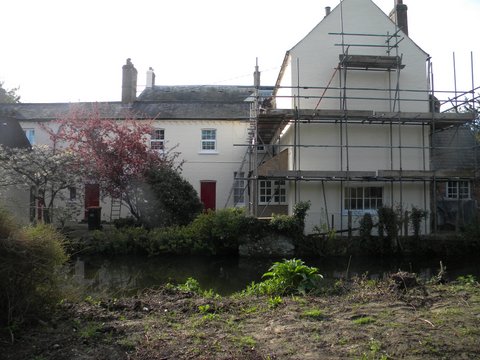
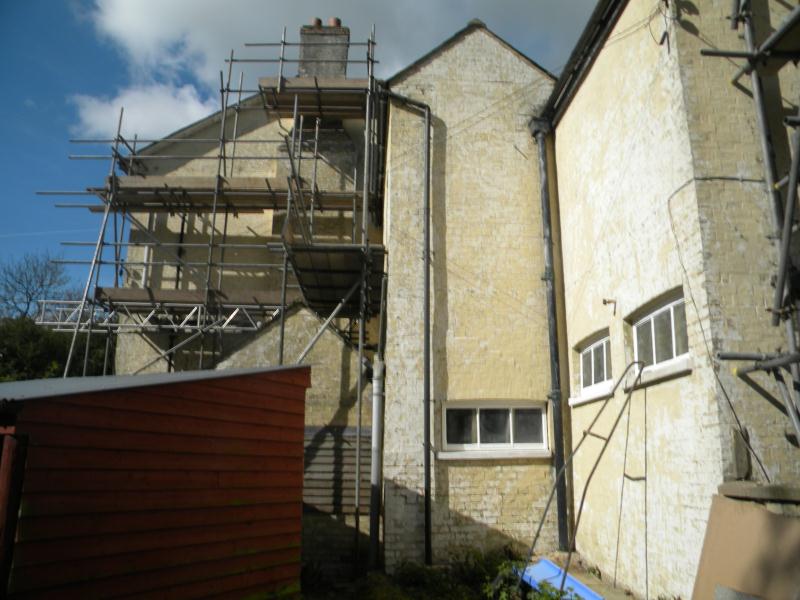
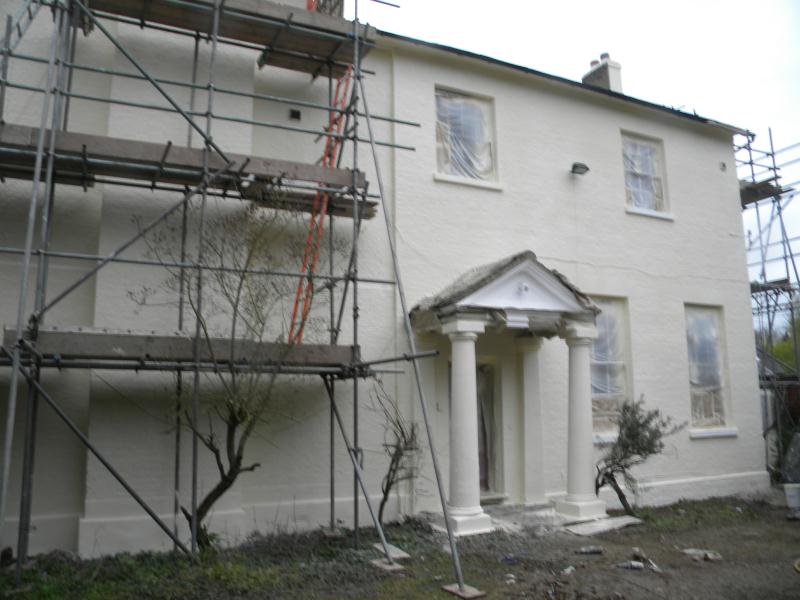
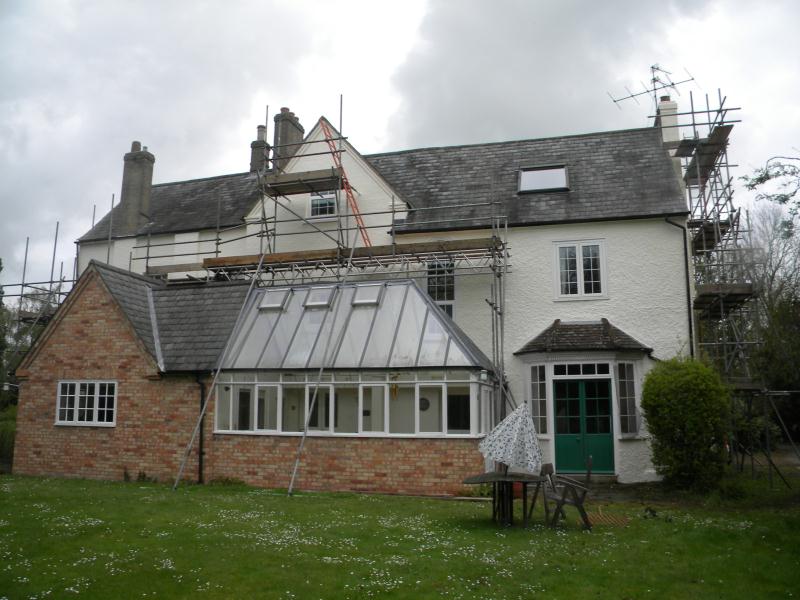
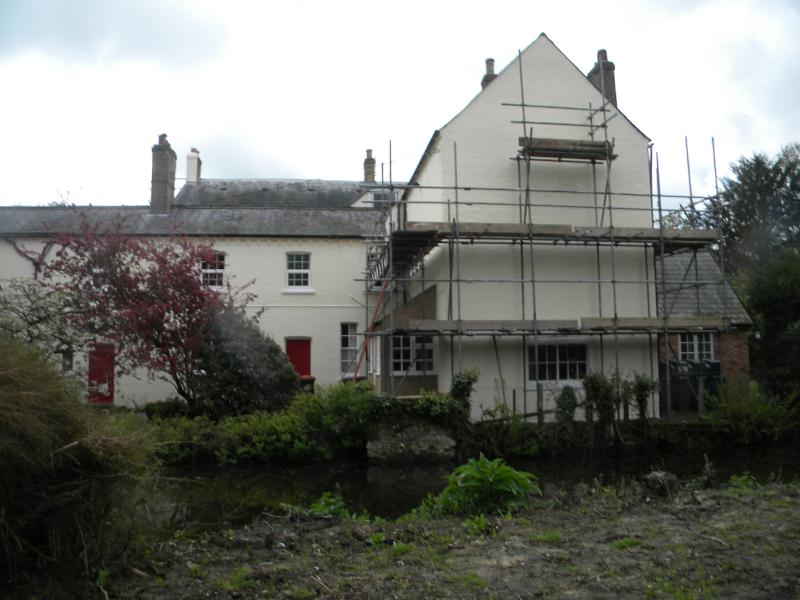
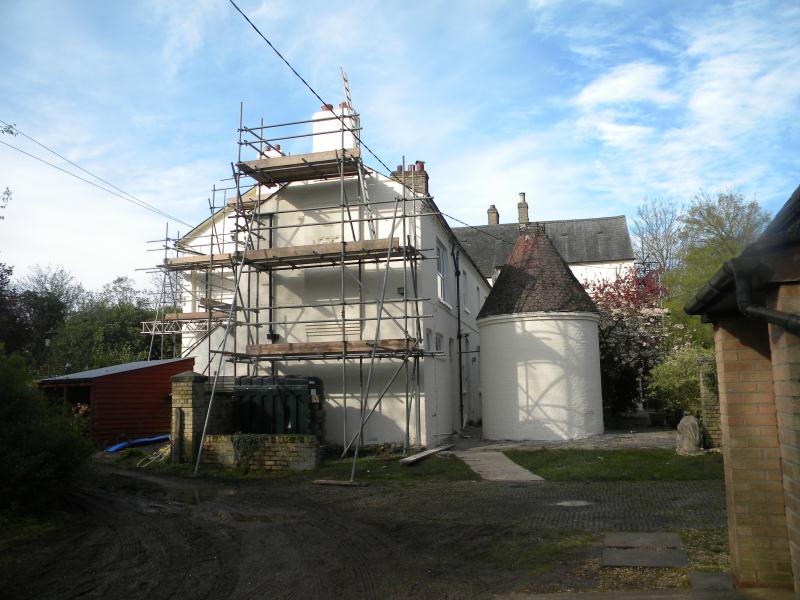
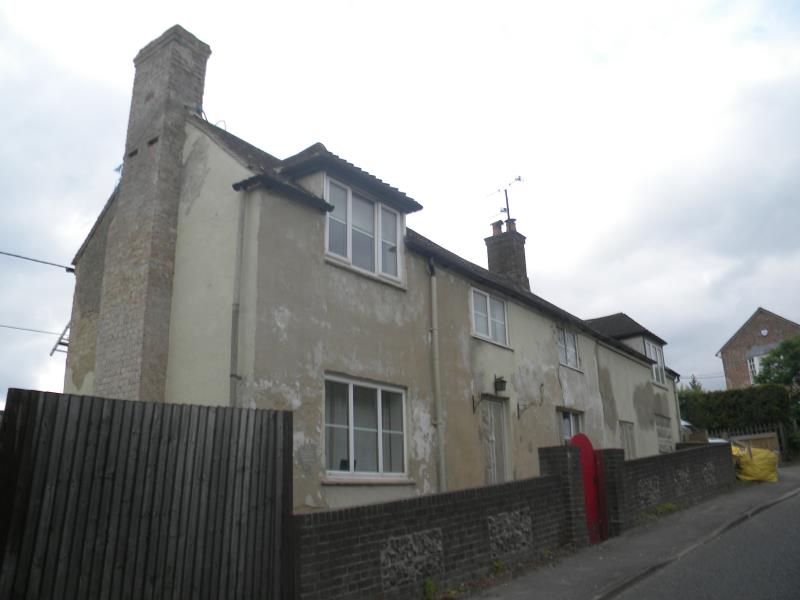
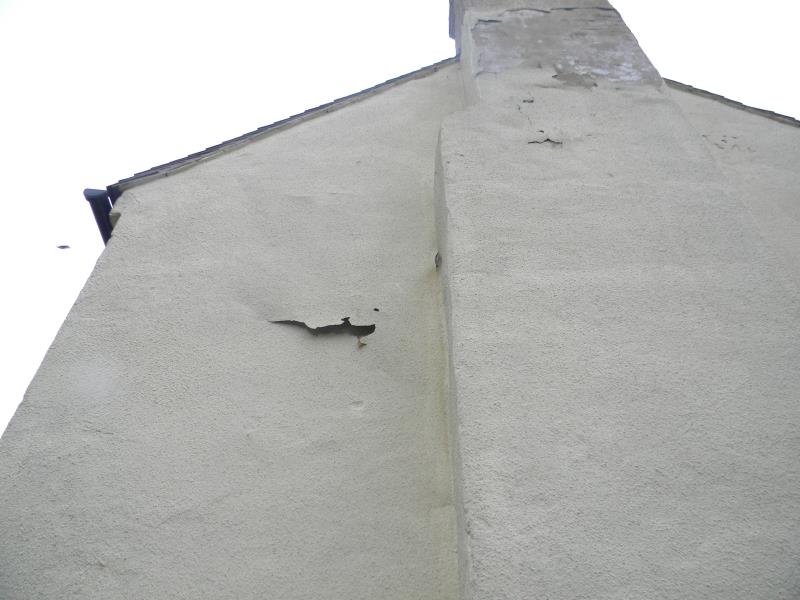
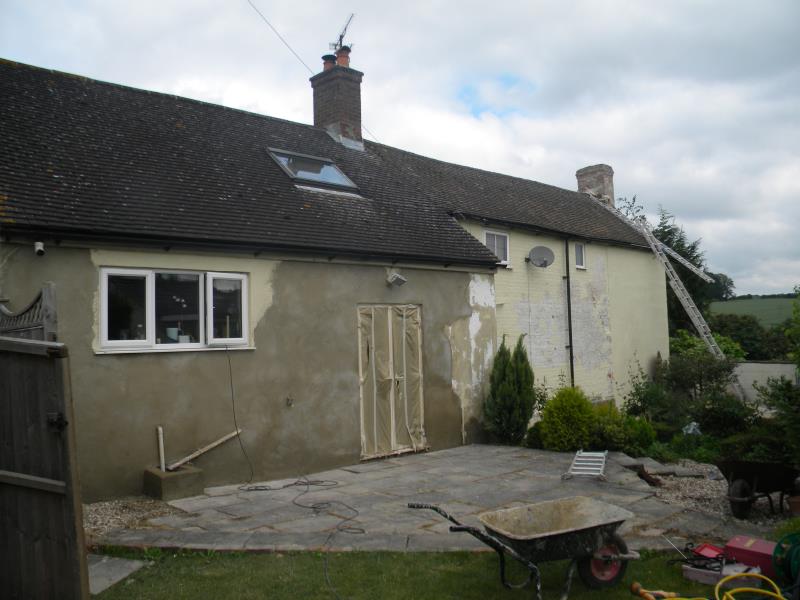
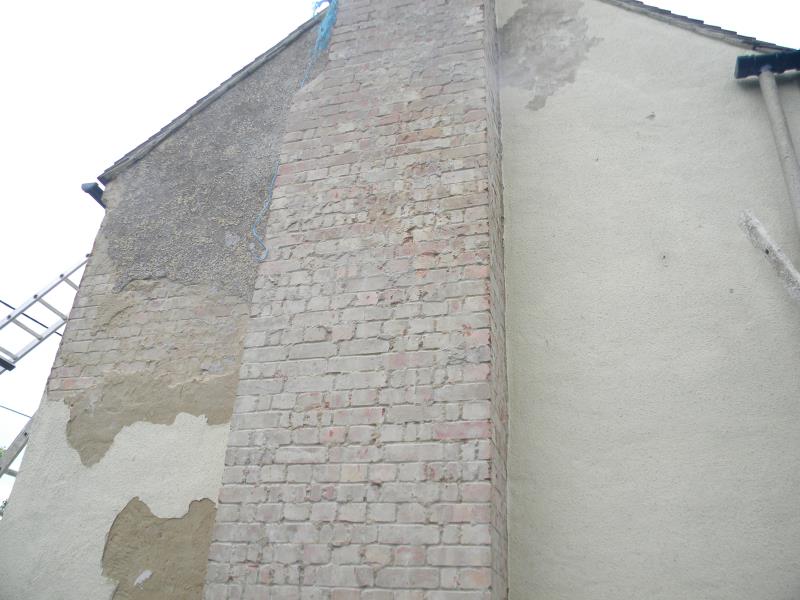
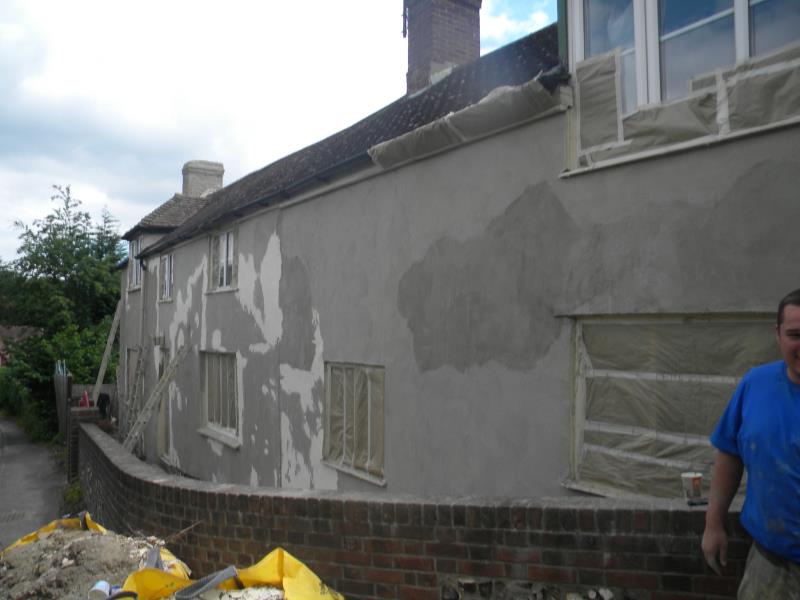
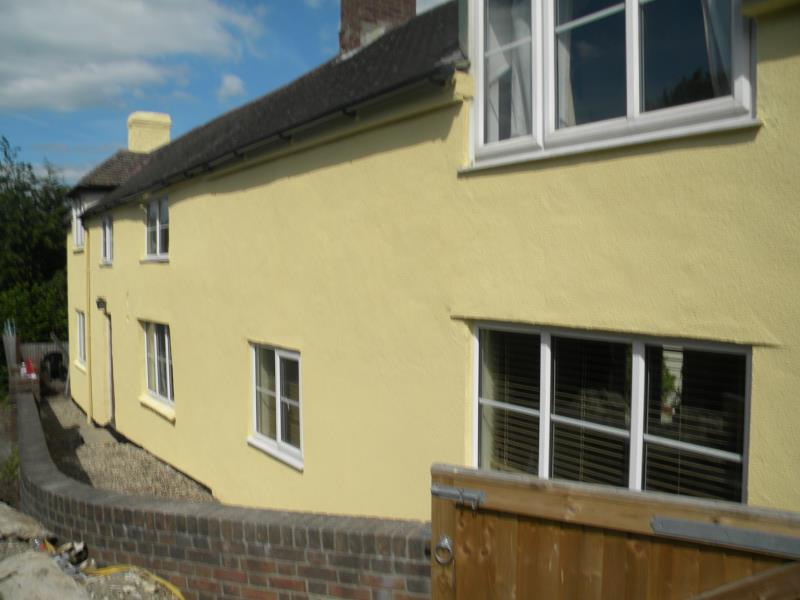
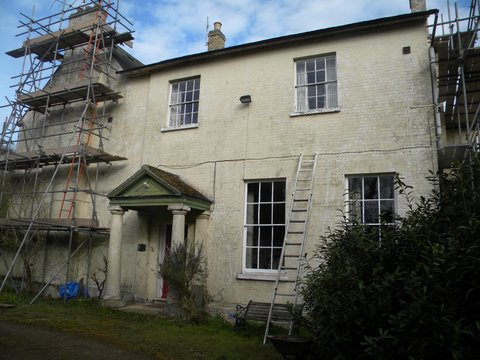
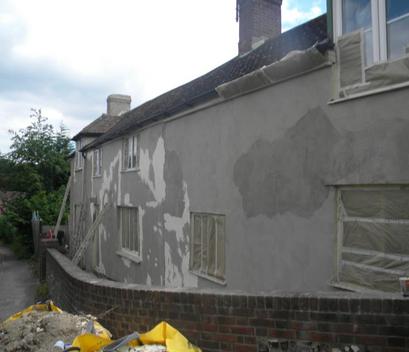
This large property situated in Bedfordshire was in urgent need of renovation, and needed extensive repairs to the external walls and chimney stacks.
The property is owned by a Christian Aid Center helping disabled people to overcome there difficulties by providing learning in a beautiful secure environment
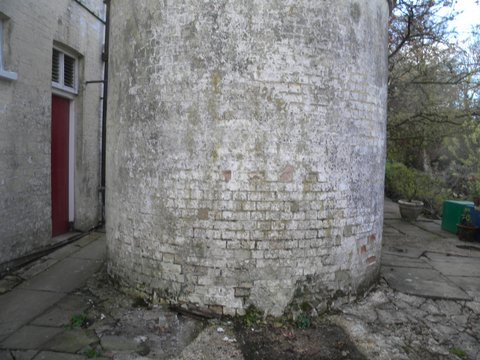
Set in its own grounds the property is surrounded by an extensive woodland setting with its own moat .
Although a beautiful setting the damage to the exterior walls from the trees was extensive and would need a lot of preparation before we could apply our high performance coatings..
Because of this environment it was decided to use a superfine finish that would not only hide a lot of surface defects in the brickwork, but also provide a clean surface eliminating the problem of mould and algae growth.
Schedule of works
* Power washing to all external areas including gutters and soffits
* Application of Biocide to all areas.
* Extensive repointing and brick repairs throughout all elevations.
* Extensive repairs to the chimney stacks and flashing's.
* All soffits and the front entrance was being sprayed in and therefore
needed extensive repairs to the woodwork.
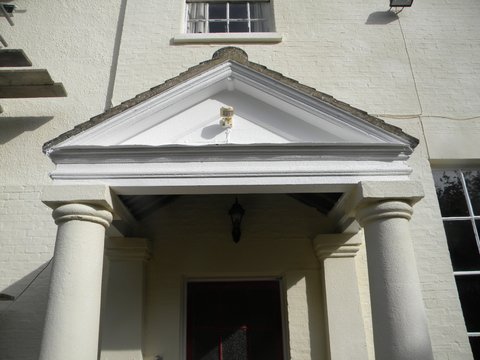
* Front columns and stone moldings around the property needed
repairs
* Property was completely masked up using polythene on most windows
to allow daylight in during the works
* The base coat primer was applied by airless spray to give a good
base for the final top coat
* The final coat was applied using high pressure spray equipment to give
a uniform finish throughout the property.
Please click on photos to enlarge
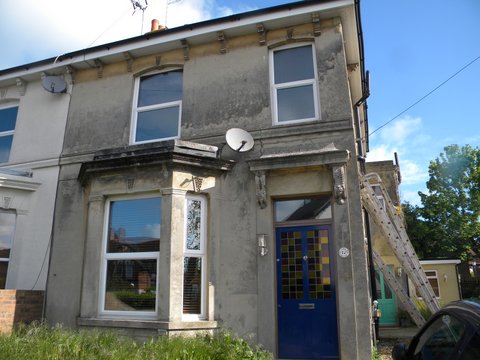
CASE STUDY 2
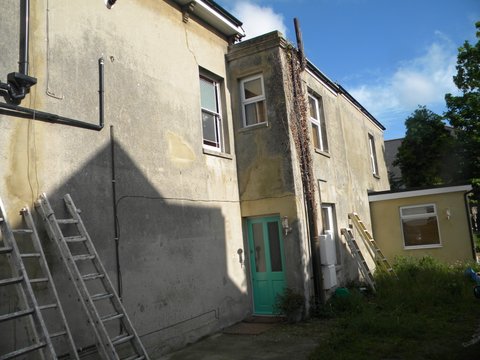
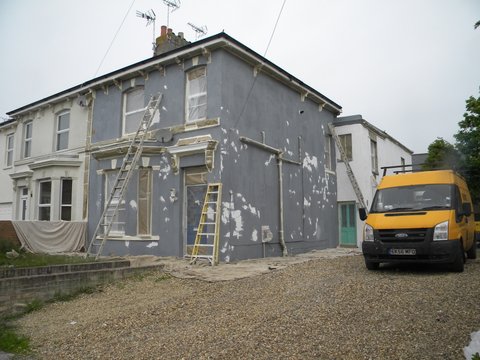
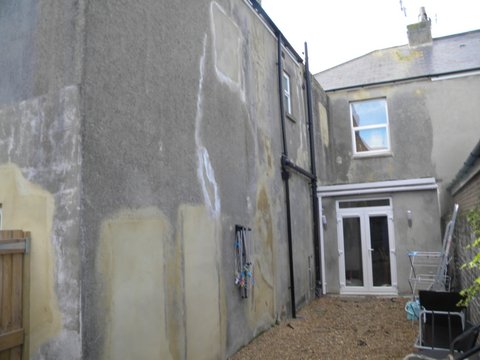
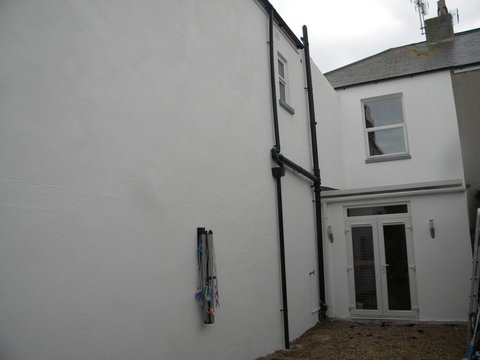
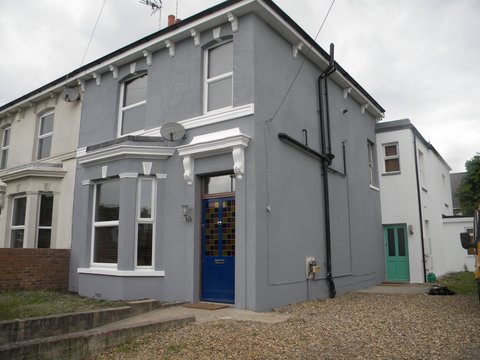
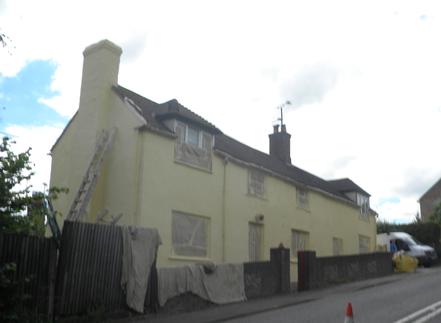
This property in Margate ( Kent ) was purchased by 2 sisters and decided to convert it into 2 separate houses . The front house was to be in Gray with white features and the back house to be in white with gray features, The clients was delighted with the overal finish on completion.
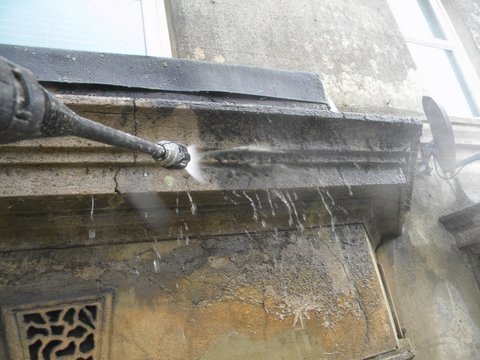
The property built in the late 1800s had never been painted and the external walls was in a very bad state of repair.. The external render had long lost its water proofing ability and was now acting like a sponge, soaking up rainwater and causing serious internal damp problems . The mould and algae on the external walls was so ingrained into the render that we had to use a Hot pressure washer as a standard one had no effect on removing the ground in spores.This was then sprayed with 2 coats of a strong Industrial biocide to sterilise the surface..
* Hot power wash all areas to remove contaminates
* Spray apply 2 coats of Biocide to all areas.
* Remove all blown render and replace.
* Repair / all mouldings and features.
* Spray out all features in white and grey as required ( smooth )
2 coats
* Mask up all areas not to be sprayed ( including features )
* Apply base coat to all areas.
* Face fill any imperfections in surface.
* Apply GUNEX high build coating ( medium texture ) to all
prepared areas using high pressure spray.
* On completion remove all masking and touch up final
imperfections.
* Remove all resulting rubbish and debris from site and leave in
a clean condition .
Please click on photos to enlarge
Call us for a free ( No obligation Survey and quotation ) on Tel: 0203-693-3797 or use the contact form below
Schedule of works
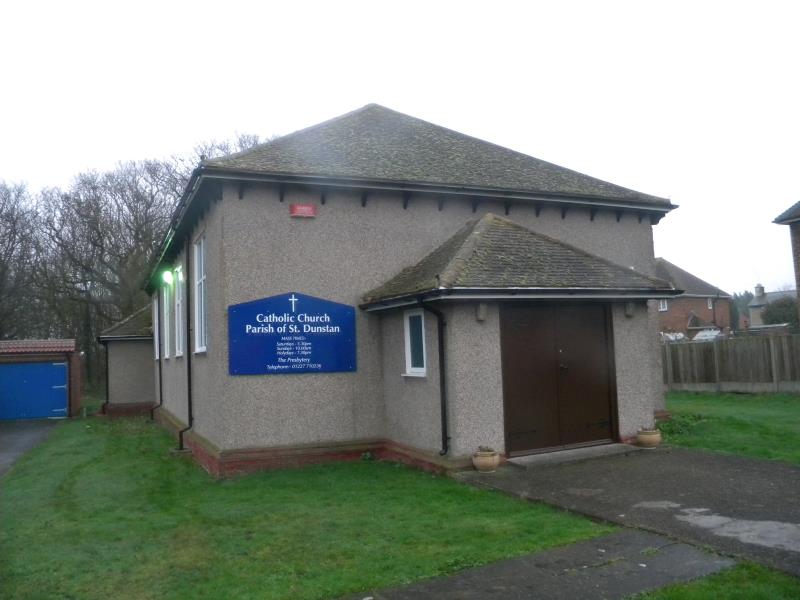
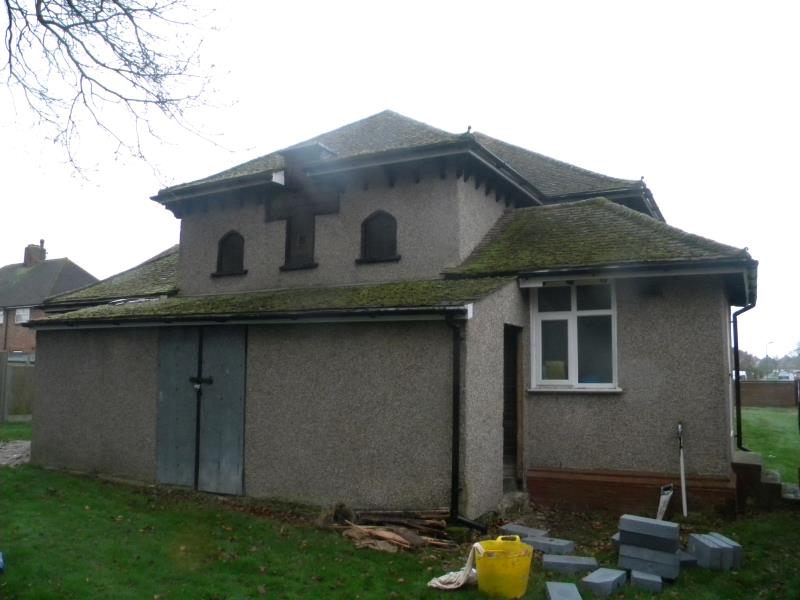
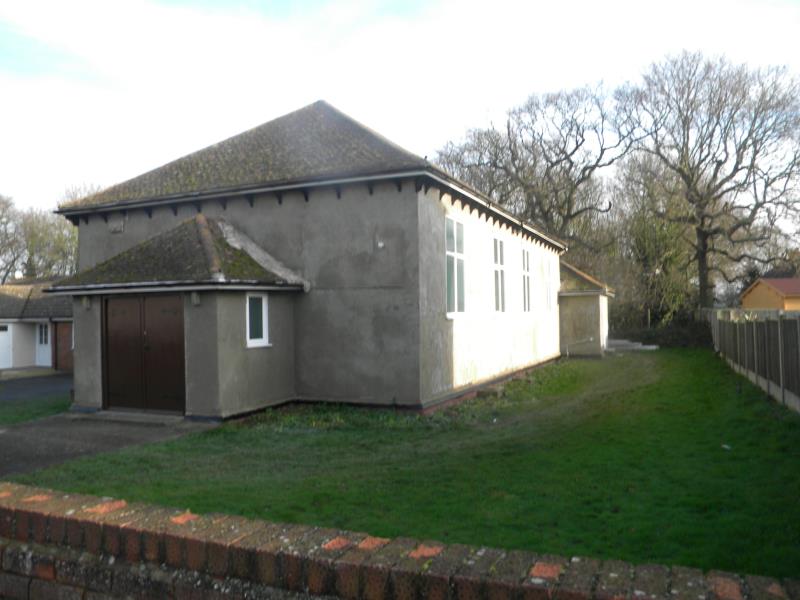
CASE STUDY 3
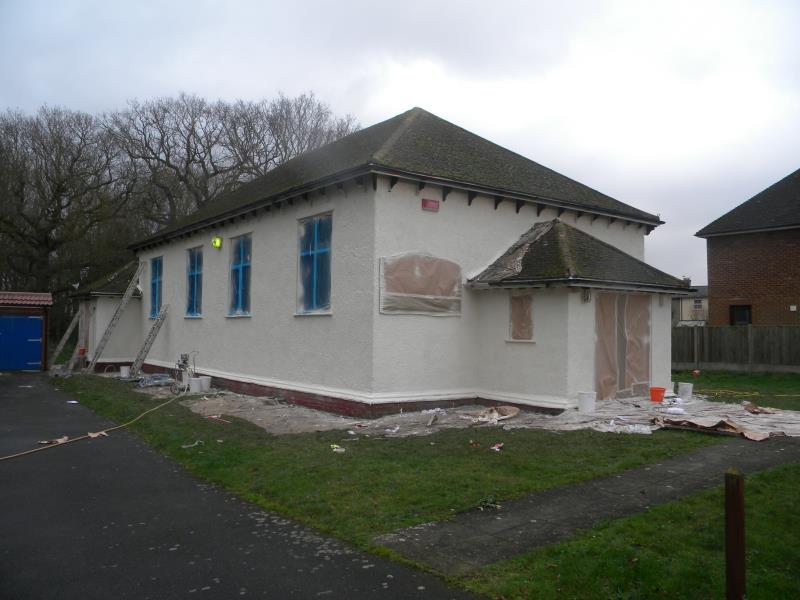
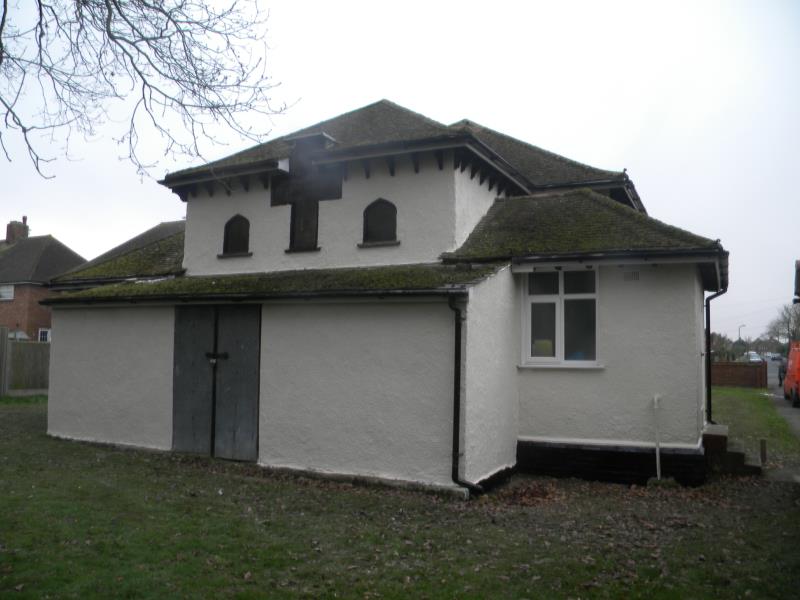
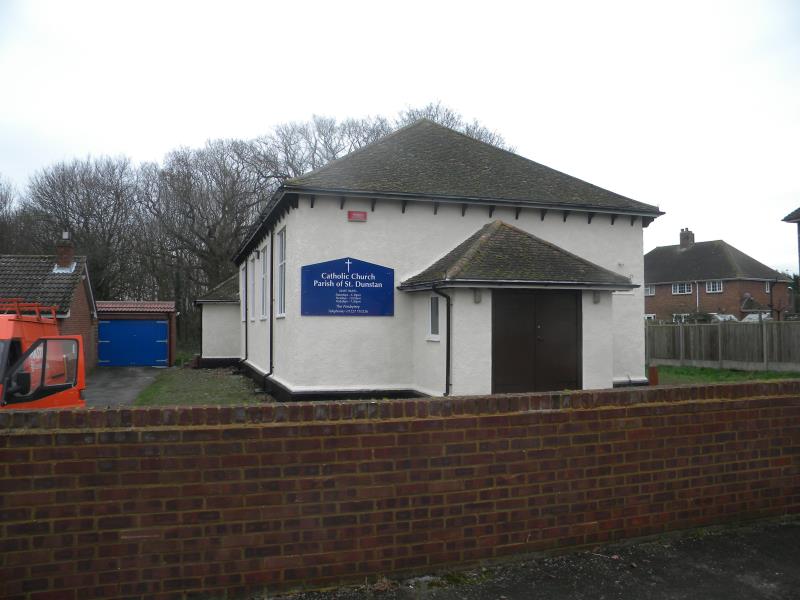
This small church in Canterbury was in need of a face lift, over the years the exterior surface had been patched up and left many scars
showing.
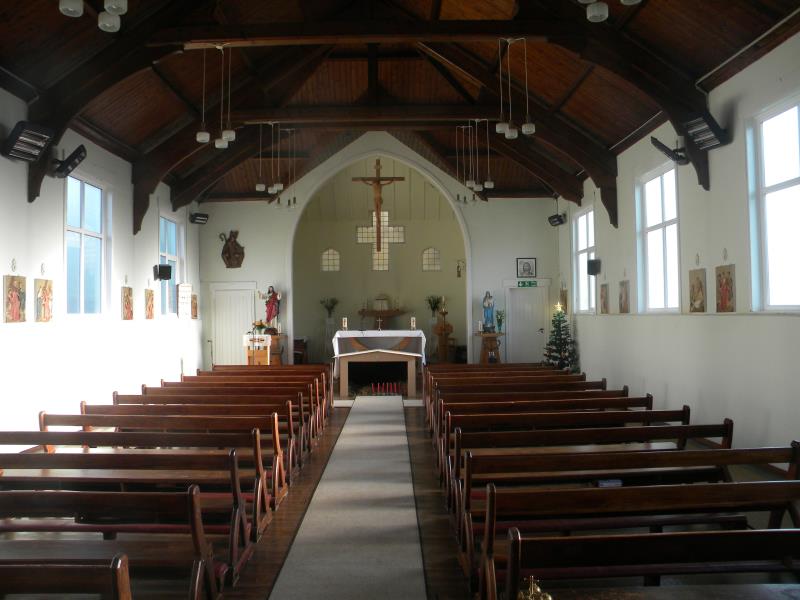
Our clients was looking for for a waterproof finish that would also stop damp penetrating the inside walls that was causing a problem with
the beautiful interior ( see pics below) and transform a rather dull pebbledash finish into a bright and clean look.
The building was over 100 years old in places and was constructed from a wide variety of building materials.block, brick , stone, and wood.
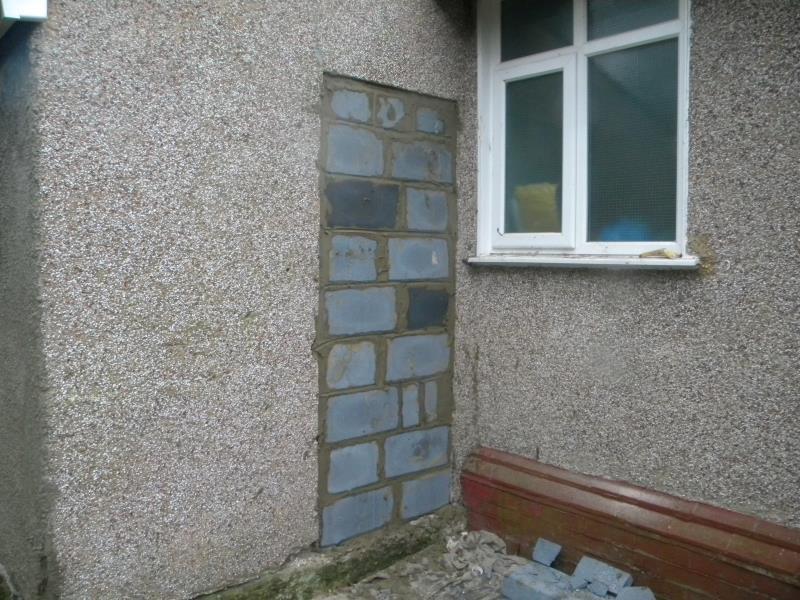
a rear door was not used anymore and this was filled in at the clients request
* Remove old rear door and build in and render to match
existing surface.
* Power wash / Biocide all external wall surfaces.
* Remove and replace all blown rendering to match
existing.
* Apply a polymer cement base coat to all pebble dashed
areas .
* Paint out all mouldings and plinths in black.
* Mask up all areas not to be treated,
* Apply a base primer coat to all prepared areas, fill and
coat any imperfections / scars remaining.
* Apply a fine WALLCOTE finish by high pressure spray.
* Demask and clean up .remove all resulting debris, render,
from site.
Please click on photos to enlarge
Schedule of works
Please click on photos to enlarge
CASE STUDY 4
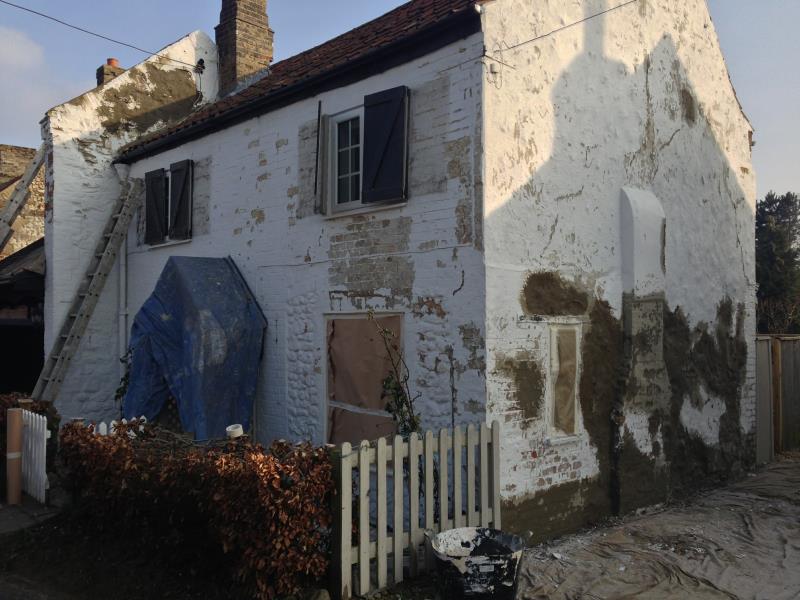
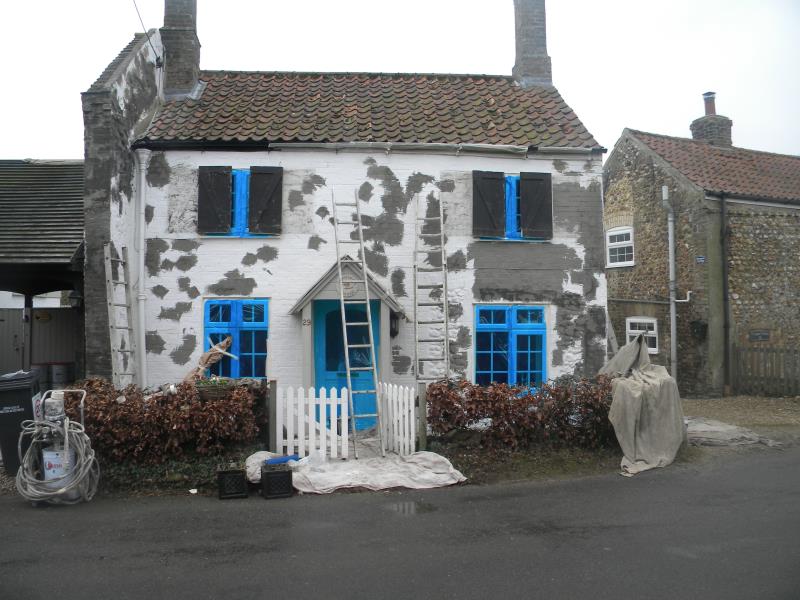
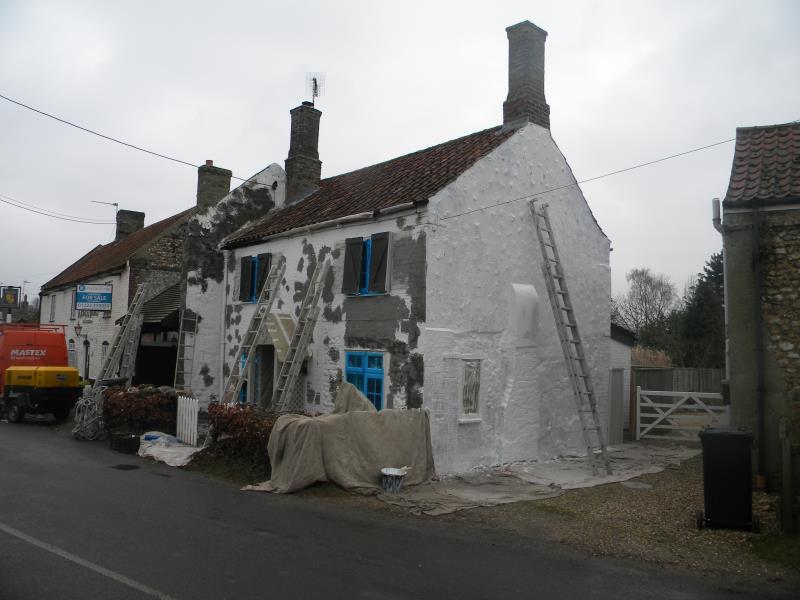
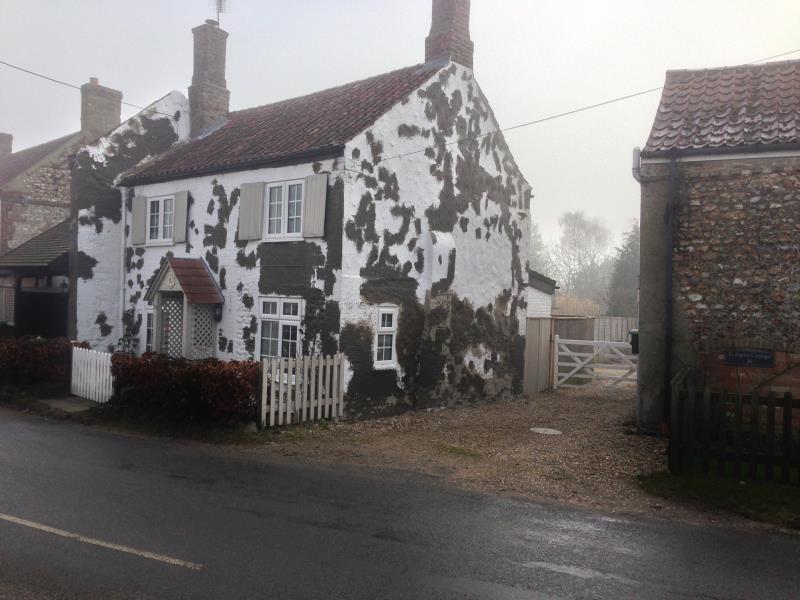
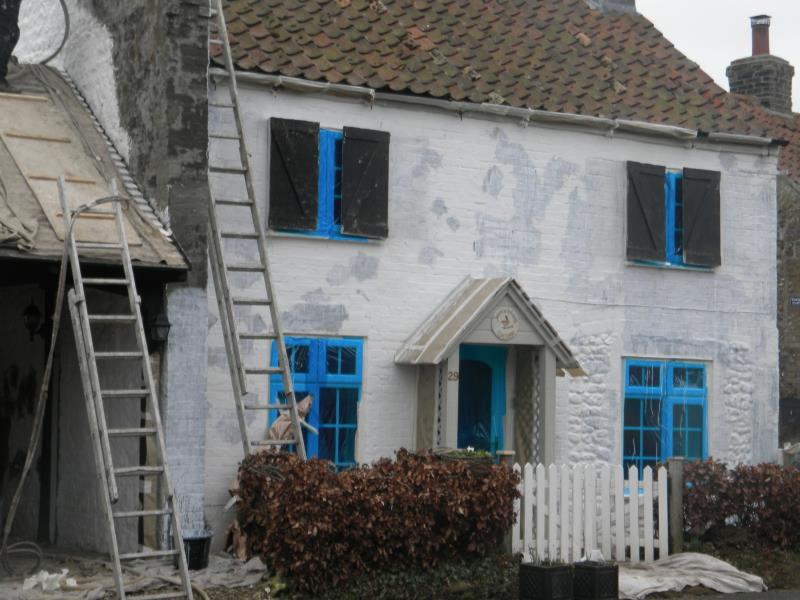
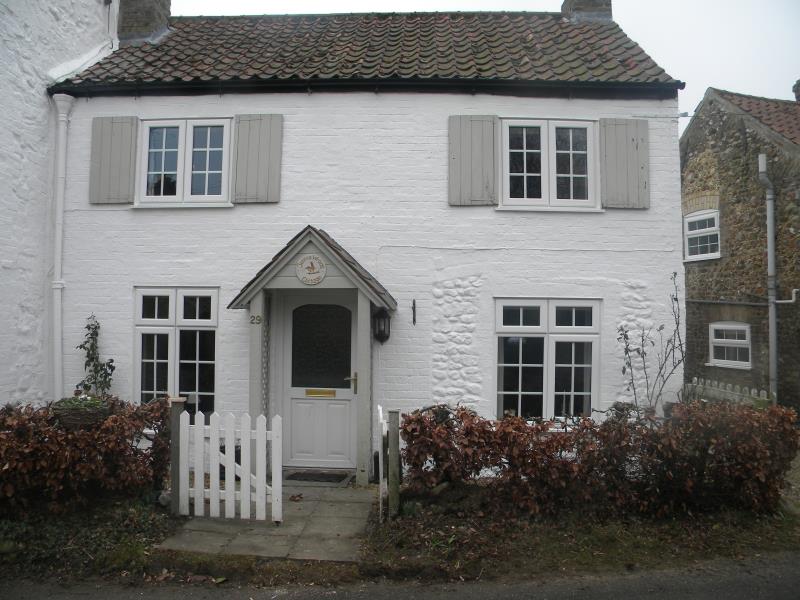
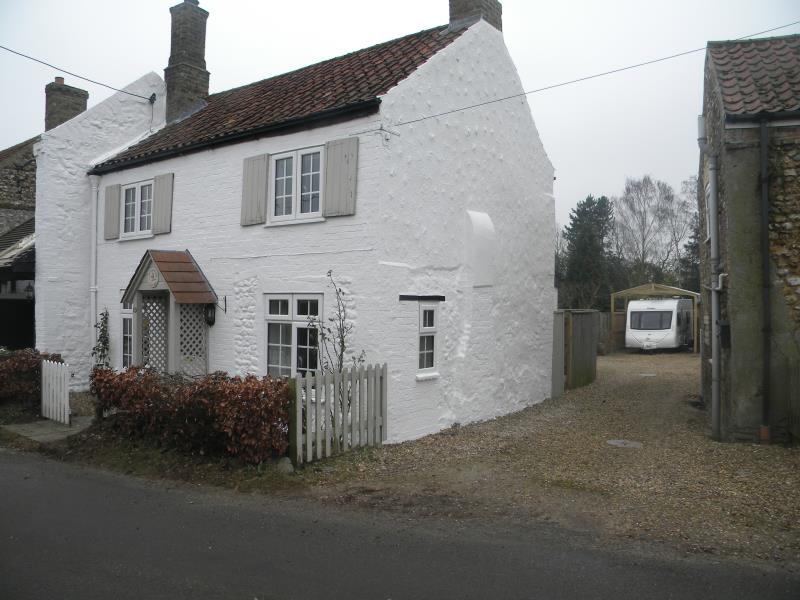
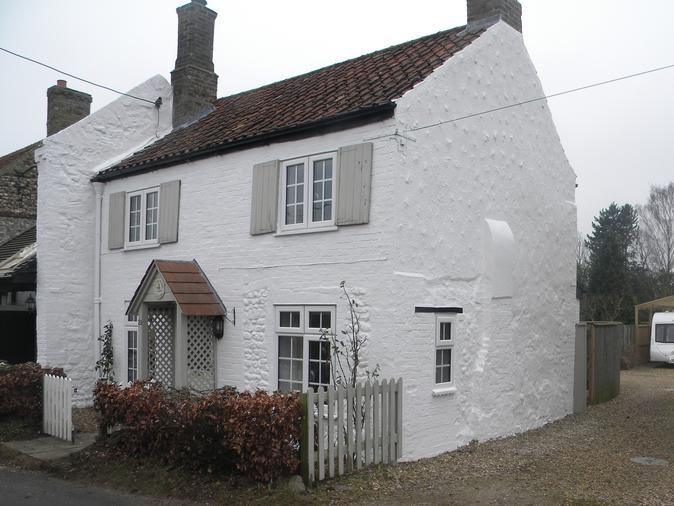
This beautiful English cottage in a small village in Norfolk was a pleasure to work on.
Built of local stone and red brick the property had a major internal damp problem caused by penetrating damp,
the client told us it was worse during heavy rain and was impossible to decorate some internal rooms due to black mould,
The house was first painted many years ago and had been painted with black bitumen to try to waterproof the external walls ,
this had made the problem worse because bitumen is not permeable and just made the problem worse, the mortar joints was
lime and this just soaked in the water during wet weather.
The only solution was to strip back the existing paint / bitumen and apply a highly flexible and permeable coating that would not only provide a beautiful flexible finish to enhance the property , but provide a much needed protective finish against the weather and eliminate the clients damp problems,
* Needle-gun all surface areas
* Power-wash all areas
* Remove all loose mortar joints and repoint
using lime based mortar
*_ Render and reface stone & brickwork to match
exsisting surfaces
* Mask all areas not to be treated
* Bag coat all rendered . and re- pointed areas
* Apply a stabiliseing solution to all areas to be sprayed.
* Apply by airless spray a base primer cote to
all render / stone / brick surfaces
* Final top coating is by heavy industrial Graco
spray pumps.
* De-mask and clean up remove from site all
resulting rubbish / debris etc.
Please click on photos to enlarge
* Needle-gun all surface areas
* Power-wash all areas
* Remove all loose mortar joints and repoint
using lime based mortar
* Cut back all cracks and pressure fill with
Sika Epoxy Resin. Insert Twist fix bars
horizontally at every 12 inches set in Sika
Epoxy Resin,
*_ Render and reface stone & brickwork to match
existing surfaces
* Mask all areas not to be treated
* Bag coat all rendered . and re- pointed areas
* Apply a stabilising solution to all areas to be
sprayed
* Apply by airless spray a base primer cote to
all render / stone / brick surfaces
* Final top coating is by heavy industrial Graco
spray pumps.
* De-mask and clean up remove from site all
resulting rubbish / debris etc.
Schedule of works
CASE STUDY 5
This property was on a very busy A road in Devon and was subject to heavy constant traffic including juggernaults, as a result the rendering
on this 17th century house had cracks throughout all elevations and was letting in rain water , causing considerable damp and damage to the
exterior walls. The client over the years had local decorators patch it up but it was a losing battle and becoming very expensive as the costs kept
on rising. and the cracks re appearing within a short time.
A complete overall of the rendering was needed and it was decided to apply a highly elastomeric coating ( 200% Elongation ) to take up the
vibrations and movement of the substrate due to different building materials, Stone, Brick, Lath, that over the years had been added to the property.
CASE STUDY 6
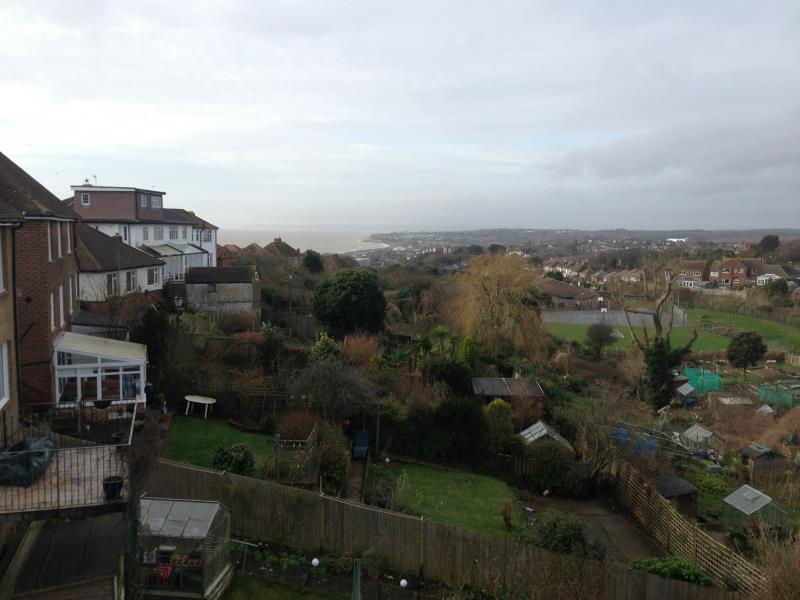
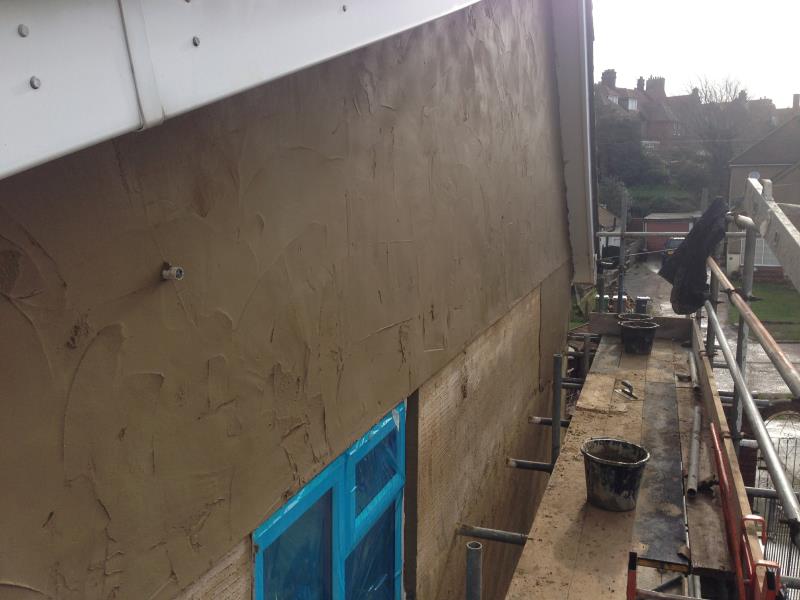
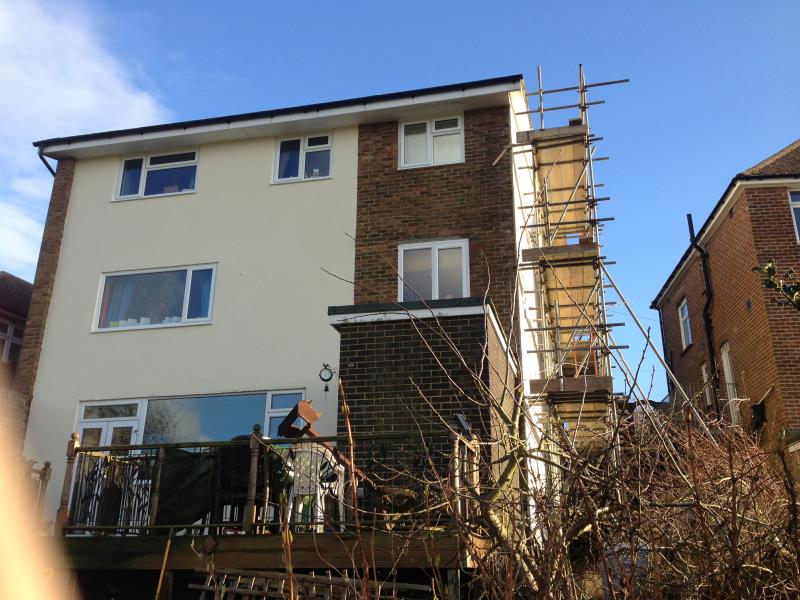
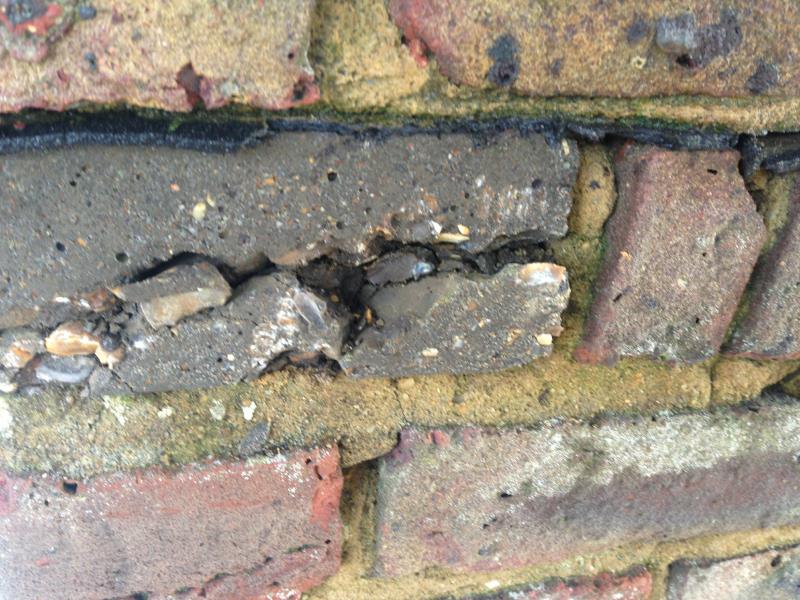
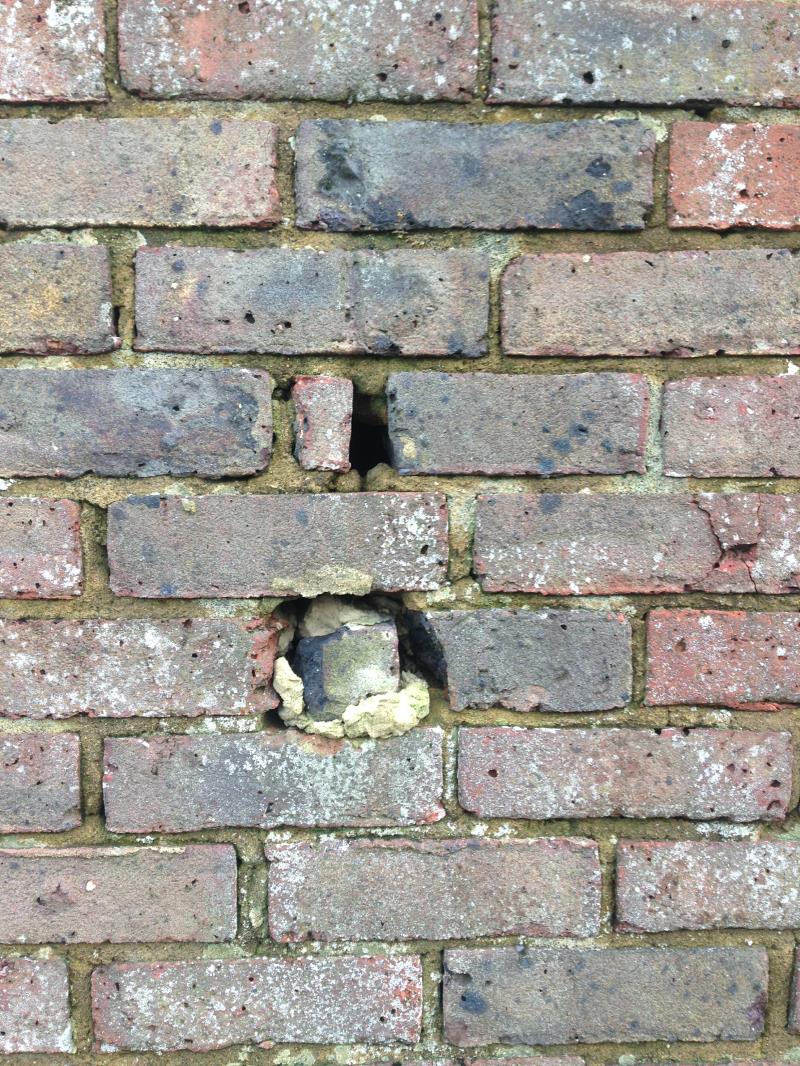
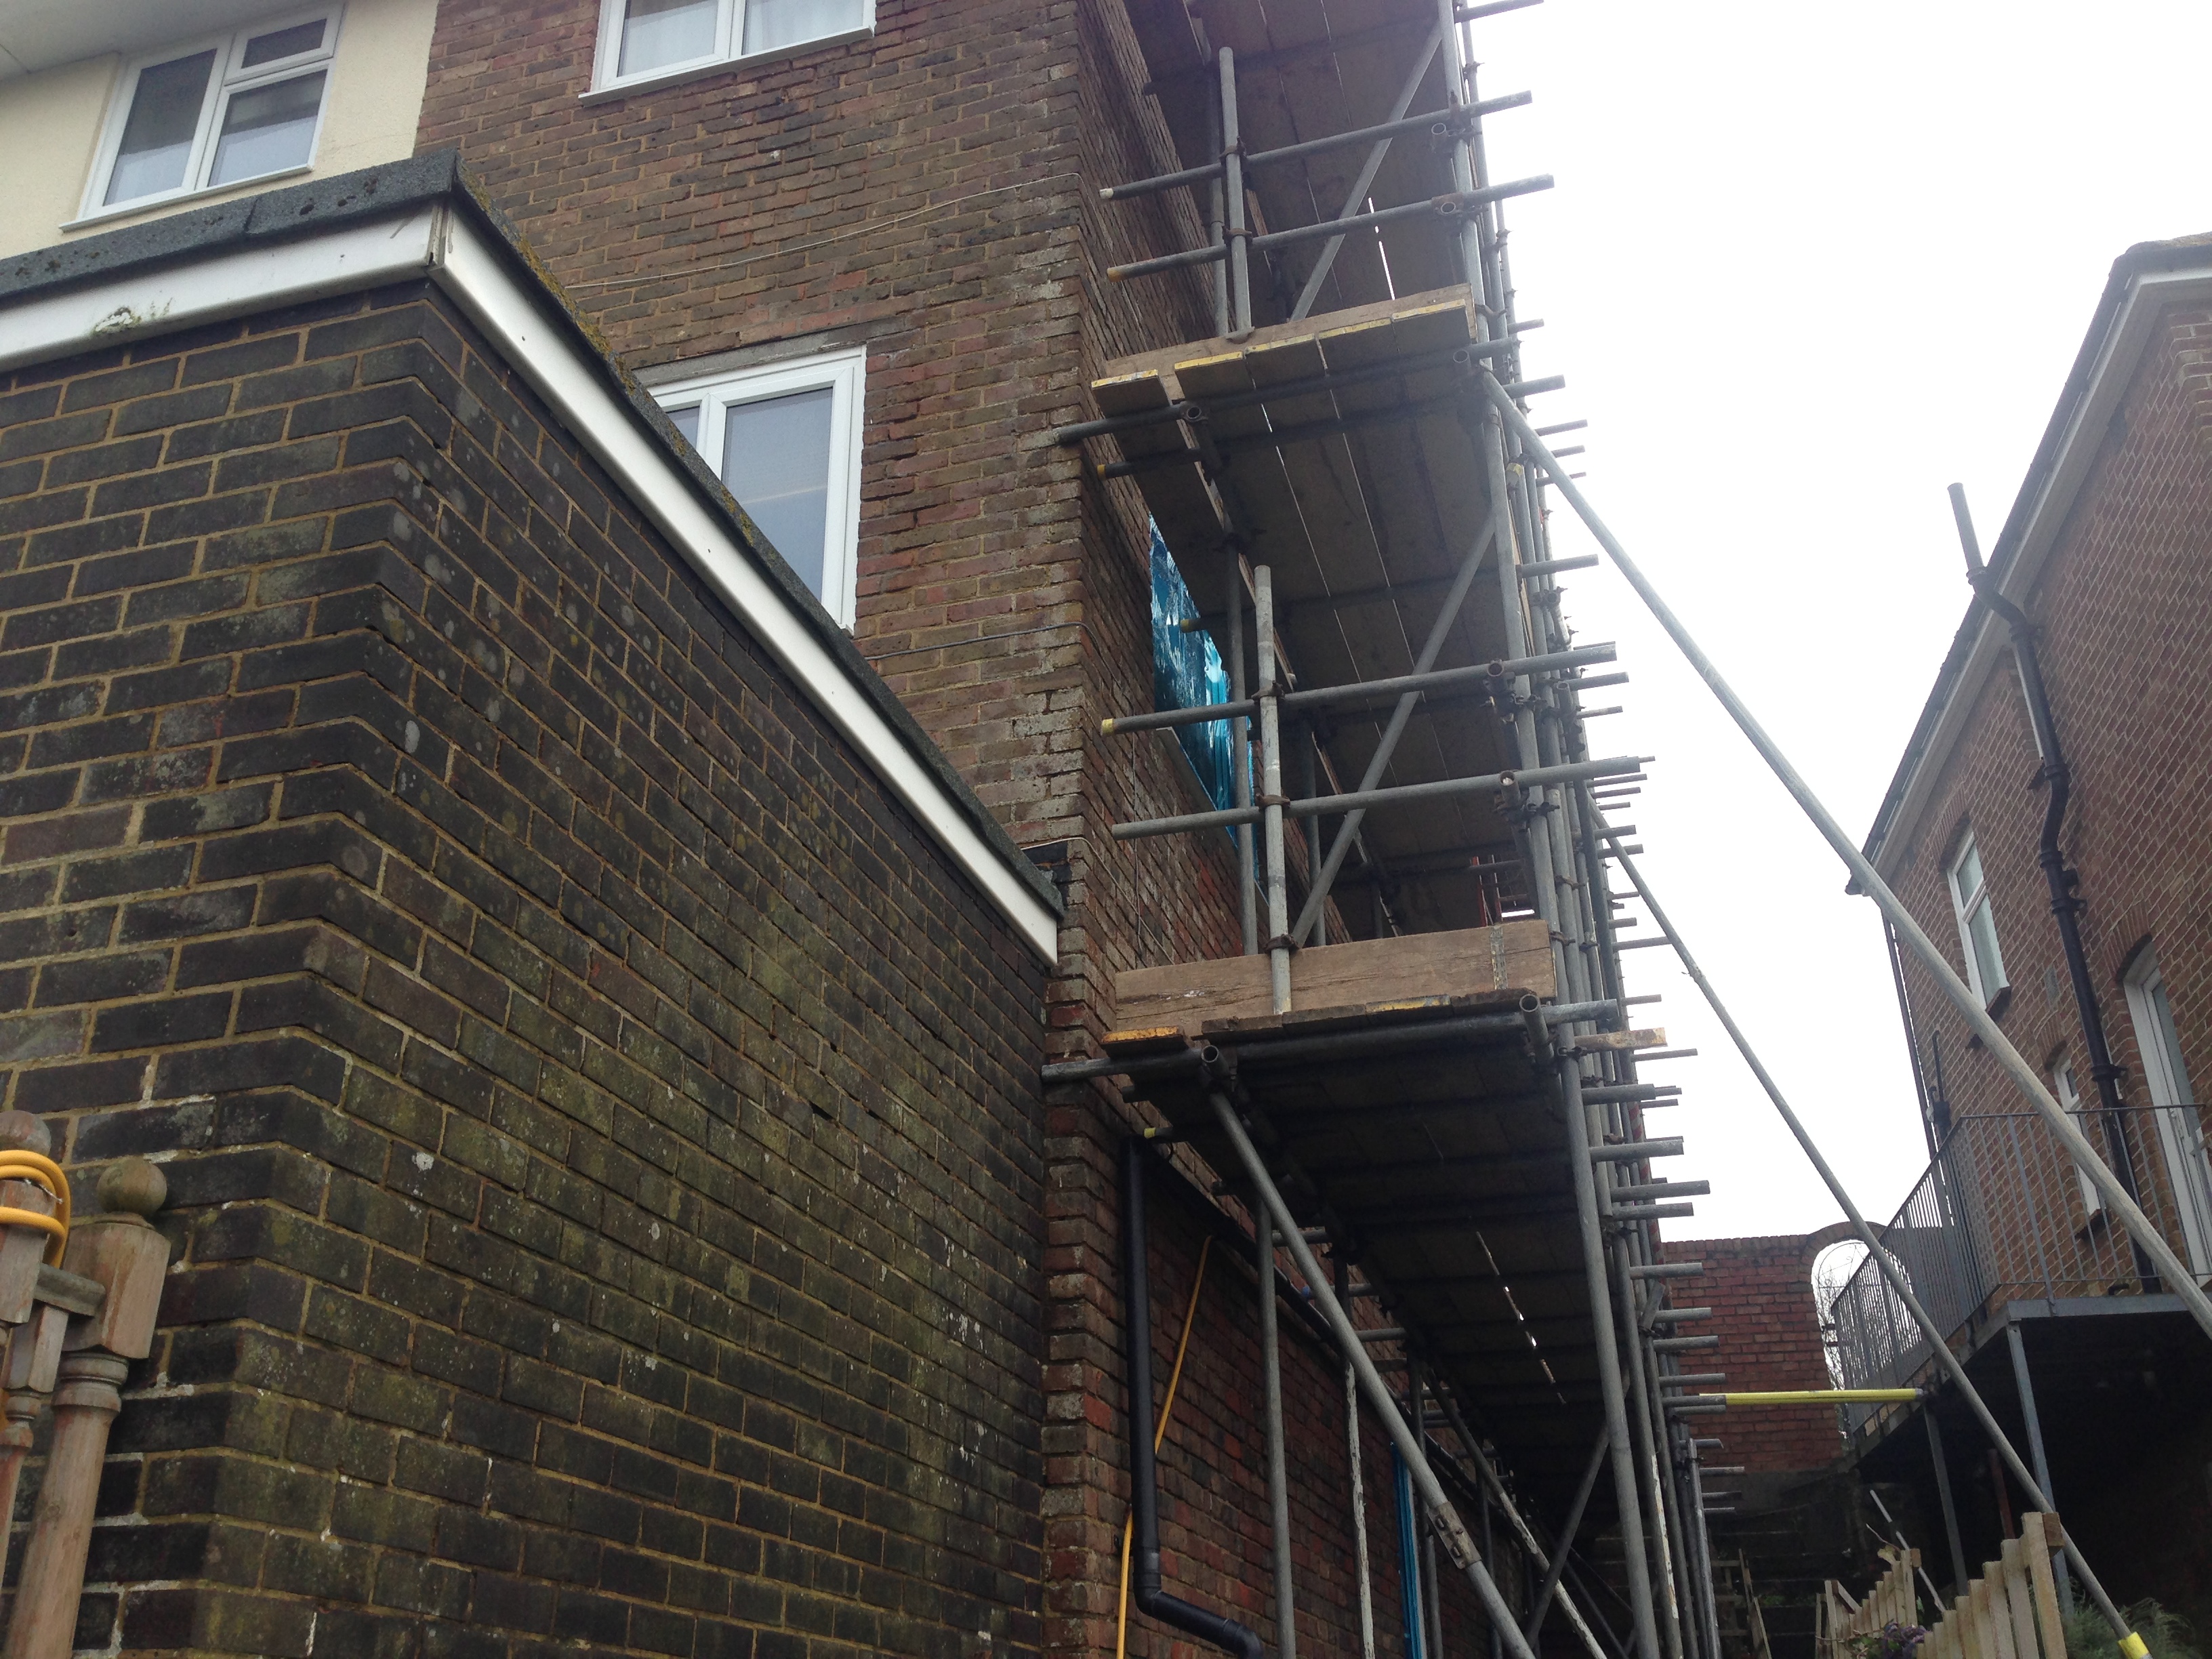
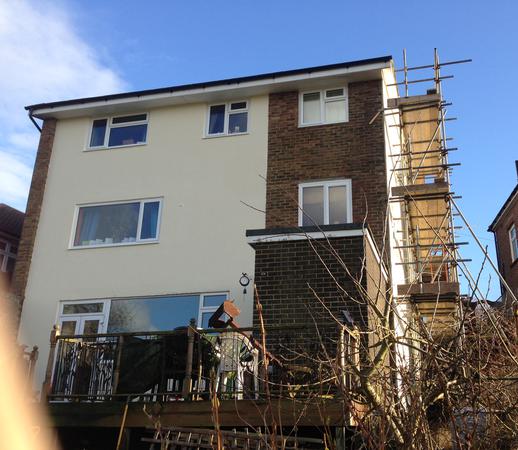
The property below was built just off the seafront in Hastings Sussex. At first glance from the road the external walls seemed in reasonable condition, however on closer inspection another picture emerged. We was asked by our client carry out a full external wall survey and quote for the remedial works. Our client was worried about the extensive loss of pointing on the south facing flank wall and an extensive internal damp patch in one area of the internal wall.. this internal damp patch was always there especially when it rained , The client had several builders around to try to solve the problem but they all concluded that it must be condensation as the walls was built in cavity and the water could not be coming from the outside. During our survey we found the problem straight away, The property was built in 1970 and when the scaffold was taken down the putlog holes was not filled in ( SEE PHOTO BELOW ) so since 1970 when it rained water would go through these holes and saturate the internal Thermalite blocks causing extensive damp on the internal walls. The property was situated very high up and was very exposed to the weather, the pointing of the brickwork was very badly eroded and in some places SERIOUSELY ERODED, several concrete lintels was cracked and eroded. and after a cavity wall tie investigation we concluded that in a few more years this wall would have been structurally unstable. Our client asked us to prepare a quotation and specification to put things right.We suggested that due to the location and exposure of the flank wall it should be rendered with a thermal render ( to boost the already insulated cavity walls ) then coated with a high performance waterproof coating
Below is our spec and photos of this contract.Although it was only the flank wall that was in urgent need of repair it was decided with the client to waterproof all of the brickwork and original rendered areas .,
SPECIFICATION OF WORKS
* Erect scaffolding to left side elevation
* Mask up all windows / doors etc
* Repair blown lintels with Concrete Mortar
* Insert Helical reinforcement bars in 304
stainless steel / Who 60 masonry grout to all
lintels on Left side elevation.
* Fix approx. 200 twistfix Helical cavity wall ties
chemical fix.
* Apply 2 coats of thermal render
* Apply on hard coat of tyrol
* Apply bagging coat to tyrol.
* Prepare all rendered areas and apply primer.
* Power wash and clean all brickwork areas.
* Apply by airless spray Andura Pro Clear clear
silicone waterproofer.to BS 6477 G/ 134
* Apply GUNX coating to all rendered /
and tyroled surfaces.
* On completion demask, clean up and remove
all resulting rubbish / debris / plant etc from site